A backyard without shade is a backyard you rarely use during the hottest months of the year. Building a pergola, covered patio, or shade sail is one of the most effective ways to reclaim your outdoor space and turn it into a retreat you actually want to spend time in. But before you start picking out lumber or fabric, there are structural, planning, and comfort considerations that will determine whether your project succeeds long term. This guide walks through the key decisions homeowners face when designing shade structures that add real value and usability to their backyard.
Planning Your Shade Structure Layout and Placement
Before any construction begins, take time to observe how sunlight moves across your yard throughout the day. The best shade structures are positioned to block harsh afternoon sun while still allowing morning light to filter through, so watch your space over a full weekend before committing to a location. Consider how the structure will relate to your home’s existing architecture, doorways, and sightlines from indoor living areas.
Placement also affects how the structure interacts with the rest of your landscaping. A pergola positioned too close to mature trees may face root interference during construction, while one placed too far from the house can feel disconnected from daily life. Many homeowners find it helpful to consult with a hardscaping contractor early in the planning process, since they can assess grade, drainage, and traffic flow before you finalize a design.
Choosing Between Pergolas, Gazebos, and Shade Sails
Not every shade structure serves the same purpose, so it helps to understand the strengths of each option before choosing one for your yard. Pergolas offer a classic look with partial shade and work well over dining areas or seating zones. Gazebos provide full overhead coverage and a more enclosed feel, making them a strong choice for yards that host frequent gatherings. Shade sails are the most budget friendly and modern looking option, ideal for covering irregular spaces like pool decks or play areas.
- Pergolas: open lattice design, partial sun filtering, customizable with retractable canopies
- Gazebos: fully roofed, often hexagonal or octagonal, better for rain protection
- Shade sails: lightweight fabric, easy to install and remove seasonally
- Pavilions: freestanding structures with solid roofs, ideal for outdoor kitchens
Understanding Foundation and Footing Requirements
Every permanent shade structure needs a stable base, and this is one area where cutting corners causes problems years down the road. Posts that are not anchored deep enough can shift, lean, or heave during freeze thaw cycles, especially in regions with clay soil. Before pouring concrete footings, it is worth understanding your local frost line depth and soil composition, since these factors determine how deep the posts need to go. Frost line depth varies dramatically by region, ranging from as little as 12 inches in the Deep South to 48 inches or more in northern states like Minnesota or Maine. Your local building department can tell you the exact requirement for your area, and it is almost always listed on permit documents. As a general rule, footings should extend below the frost line so that freezing and thawing soil pushes against the sides of the footing rather than lifting it from underneath. Soil composition matters just as much as depth. Clay soil expands significantly when wet and contracts when dry, which can crack undersized footings or slowly work posts loose over time. Sandy or loamy soil drains better and shifts less, but it may require wider footings to provide adequate load-bearing surface, since it compacts less densely than clay. As a starting point, most residential post footings measure between 8 and 12 inches in diameter and extend 24 to 48 inches deep, though larger pergolas or pavilions with taller posts often need footings closer to 18 inches wide to resist wind uplift. A simple percolation test, digging a hole and timing how quickly water drains, can reveal whether you are dealing with dense clay or well-draining soil before you commit to a footing plan. When in doubt, a quick consultation with a local contractor or engineer is far cheaper than repairing a structure that has heaved or shifted after a few winters.
For larger structures like pavilions or attached patio covers, foundation digging often requires equipment rather than hand tools, particularly when footings need to reach below the frost line or when soil is rocky or compacted. In most regions, that depth ranges from 12 to 48 inches depending on climate, so checking local building codes before breaking ground is essential. Footing diameter matters too — a typical 4×4 post support might call for a 12-inch-wide footing, while larger posts supporting heavier roof loads may need 18 to 24 inches of concrete for adequate bearing. Getting this step right prevents costly repairs later and ensures the structure remains level and secure through years of seasonal weather changes. Skimping on footing depth is one of the most common causes of shifting posts, cracked concrete, and sagging rooflines a few years down the road, especially in areas with heavy frost heave or expansive clay soils. If you are unsure about soil conditions on your property, a quick consultation before digging can save significant time and money. A soil test can reveal whether you’re dealing with dense clay, loose sand, or rocky subsoil, each of which affects how wide and deep your footings need to be and whether you’ll need gravel backfill for drainage. Since roofers are often already coordinating with contractors on attached patio covers, looping them in early can help ensure the roofline and footings align properly. This is particularly important when the new structure ties into existing fascia or rafters, where even small miscalculations in footing placement can throw off pitch, flashing, and water runoff once the roof goes on.
Selecting Materials That Withstand Weather
The material you choose for your shade structure affects both its appearance and how much maintenance it will demand over time. Cedar and redwood are popular for their natural resistance to rot and insects, though they require periodic sealing to maintain their color and durability. Aluminum and vinyl structures require far less upkeep and resist warping, making them a smart choice for humid or coastal climates.
- Cedar: attractive grain, naturally rot resistant, needs resealing every 2 to 3 years
- Redwood: durable and lightweight, higher upfront cost
- Aluminum: low maintenance, powder coated finishes resist rust and fading
- Vinyl: budget friendly, minimal upkeep, limited color options
- Steel: strongest option, best for large spans, requires rust prevention coatings
Combining Shade Structures With Pool and Patio Areas
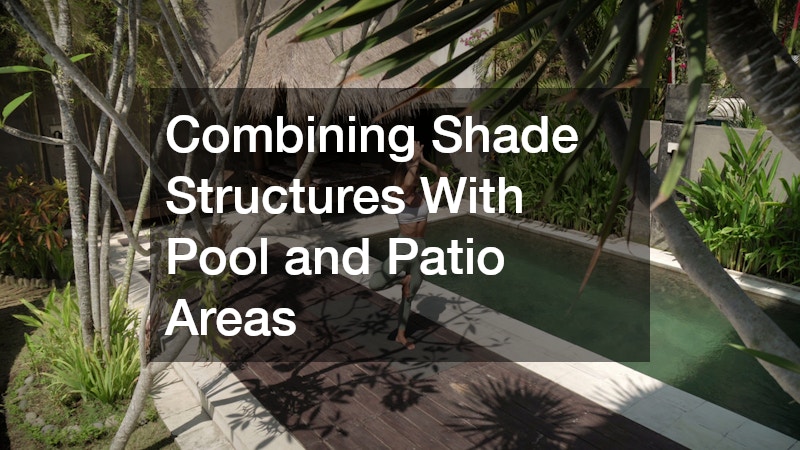
If your backyard retreat centers around a pool, shade becomes even more essential for comfort and safety. Extended sun exposure not only makes lounging uncomfortable, it also accelerates the fading of pool furniture, decking materials, and even liner colors over time. Many homeowners planning a pool renovation take the opportunity to design shade structures at the same time, since coordinating both projects ensures the decking, drainage, and structural footings work together seamlessly. Tackling both at once also avoids the headache of cutting into new concrete or hardscaping later to add footings for posts. It’s worth consulting with your contractor early about material choices, too, since materials like powder-coated aluminum and vinyl resist moisture and chlorine splash far better than untreated wood. Adding a pergola or pavilion near the pool also gives swimmers a place to cool off without leaving the water feature area entirely. A pavilion with a solid roof works well for full sun protection, while a slatted pergola paired with a retractable canopy offers more flexibility for those who want partial shade at different times of day. Positioning the structure along the western or southern edge of the pool, depending on your region, can also block the harshest afternoon rays when the sun is at its most intense. Finally, consider how the shade structure ties into your pool’s overall traffic flow. Leaving a clear, unobstructed path between the shaded seating area and the water helps prevent slips near wet pavement, and it keeps the space feeling open rather than cramped.
Pools aren’t the only backyard feature that benefits from thoughtful shade planning. Patios built for outdoor kitchens, lounges, and dining areas gain significant usability when shielded from direct sun, often extending comfortable use of the space by several hours a day and well into the hotter summer months. If your outdoor kitchen includes cabinetry, choosing weather resistant kitchen cabinets can help these spaces hold up to sun, humidity, and moisture just as well as the shade structure protecting them. Materials like marine-grade polymer or stainless steel resist warping and fading far better than standard wood, which matters when kitchen cabinets sit exposed to fluctuating outdoor conditions year-round. Positioning a structure so it shades the areas where people gather most, rather than just an empty corner of the yard, makes the investment far more practical. Consider the sun’s path throughout the day and season — a pergola that offers perfect afternoon shade in June may leave a dining table fully exposed by September as the angle shifts. Think about how your family actually uses the backyard before finalizing where the shade will fall. If weekend cookouts happen near the grill and evening meals happen at the dining table, a single structure spanning both zones, or two smaller ones positioned strategically, will deliver far more value than shade placed for looks alone.
Protecting Structures From Insects and Pests
Wooden shade structures can become attractive targets for termites, carpenter ants, and other wood boring insects if they are not properly treated and maintained. Regular inspection of posts and beams, especially where wood meets the ground, helps catch infestations before they compromise structural integrity. Applying borate based wood treatments during construction offers an extra layer of protection against pests common in humid climates.
Overhanging tree branches can also create pathways for pests to reach your structure and contribute to excess moisture buildup from shade and falling debris. In some cases, a tree removal company may recommend trimming or removing branches that hang too close to a new pergola or gazebo, both for pest prevention and to reduce the risk of storm damage. Keeping a clear buffer between mature trees and your shade structure protects your investment for years to come.
Adding Screens and Enclosures for Bug Free Comfort
Open shade structures are great for sun protection, but they do little to keep mosquitoes and other insects away during peak evening hours. Installing patio screen enclosures around a pergola or covered patio allows you to enjoy the outdoors without constantly swatting bugs, while still letting breezes flow through. These enclosures can be custom fitted to nearly any structure shape, including curved gazebo roofs and rectangular pavilions.
- Retractable screens allow flexibility between open air and enclosed use
- Fixed panel screens offer maximum durability for high traffic areas
- Fine mesh options block no see ums in addition to larger insects
- Screened structures also reduce leaf and debris buildup on furniture
Incorporating Electrical and Utility Considerations
A truly functional backyard retreat often includes lighting, ceiling fans, or outlets for entertainment devices, all of which require careful electrical planning. Running conduit before the structure is fully built is far easier than retrofitting wiring afterward, so map out your electrical needs during the design phase. Think through every fixture you might want—string lights, recessed can lights, a television, a sound system, or charging stations for phones and laptops—and sketch their approximate locations so the electrician can plan circuit runs accordingly. Most residential panels are rated for 100 to 200 amps, and older homes may already be running close to capacity once major appliances are accounted for. If your outdoor plans include a kitchen, hot tub, or extensive lighting system, your home’s electrical panel may need additional capacity to handle the load, and a licensed electrician can perform a load calculation to confirm whether a panel upgrade or a dedicated subpanel makes sense. All outdoor outlets should be GFCI-protected and rated for exterior use to meet code and keep the space safe in wet conditions. Timing matters just as much as capacity. Scheduling your electrician’s rough-in work to align with the framing stage prevents costly rework and keeps the project moving on schedule. If you’re adding plumbing for an outdoor kitchen or wet bar, hiring the best plumber you can find ensures the water lines are installed correctly alongside the new wiring, with proper spacing maintained between electrical and plumbing runs to avoid inspection issues down the road.
Before pouring footings or installing posts, it’s worth mapping out the electrical needs of your shade structure alongside your broader backyard power plan. Lighting, ceiling fans, outdoor speakers, and mini-fridges all draw power, and running conduit before construction is far easier than retrofitting it later. This is also the right time to think about backup power, especially if you live somewhere prone to storms or rolling blackouts. For homeowners considering backup power for their outdoor living space, exploring generator sales and service options during the planning phase makes sense. A properly sized generator, generally in the 5,000 to 10,000-watt range for typical patio circuits, can keep string lights, fans, and refrigeration running during an outage, which matters if your shade structure is central to how you entertain guests. Working with a generator sales and service provider early lets you determine whether a portable unit or a permanently installed standby generator best fits your layout and usage patterns. Coordinating this early also avoids the need to dig new trenches or reroute wiring after the structure is already standing. It gives your electrician a chance to plan circuit capacity, add weatherproof outlets in the right spots, and install GFCI protection where required by code. Taking care of these details up front saves both money and disruption down the road, and it ensures your shade structure functions as a true extension of your home rather than an afterthought.
Maintaining Comfort Through Climate Control Extensions
Some homeowners choose to extend their home’s climate control system into covered patios or three season rooms attached to the house, which blurs the line between indoor and outdoor living. This kind of upgrade requires careful load calculations, since adding square footage to a cooling zone puts extra demand on existing equipment. Scheduling routine AC repair and maintenance becomes even more important once your system is responsible for a larger conditioned space.
Ceiling fans, misting systems, and shade fabric all help reduce reliance on mechanical cooling in semi outdoor spaces, which is often more energy efficient than trying to fully air condition an open air structure. Combining passive cooling strategies with your existing HVAC system gives you flexibility depending on the season and weather. Talk to a professional about whether your current system can handle an extension before committing to ductwork changes.
Building a shade structure is about more than blocking sun, it is about creating a space your family will genuinely want to use for years to come. Start by mapping out sunlight patterns and how you use your yard, then work through material, foundation, and comfort decisions with the same care you would give any major home improvement. Taking the time to plan each layer, from footings to screens to electrical needs, ensures your backyard retreat holds up beautifully through every season.